
Pop-up Photos
Aug 28th 2006
| I use this technique quite a bit in my print work and the clients love it. I thought I would share it with you, its kinda like those old "pop-up" books you use to see when you were a kid. | |
|
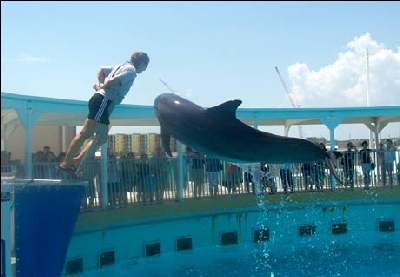
Here is my original image, taken at Florida's Gulfarium on our last family vacation. |

|
Start with creating the "Photo-frame" by drawing a selection with the Polygonal Lasso Tool (L). Make sure it is wider at the bottom than at the top so it will have the correct perspective when we're done. Next save that selection as "outer frame" by going SELECT>SAVE SELECTION. |
|
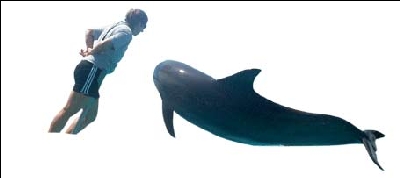
Next we want to isolate the portions of the image that are outside the selection you just saved. (Here I used the pen tool to path the dolphin and the dolphin trainer.) After my path is created I go to the "Paths" pallet and click the right pointing arrow in the top right corner of the pallet and select "make selection" (feather radius 1 pixel) Now CMD+J (CTR+J in windows) to copy the selection to its own layer. |
|
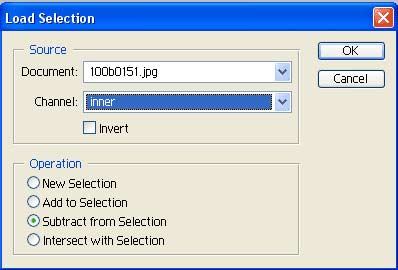
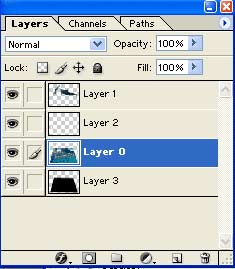
Now double click the background layer and click OK in the dialog box. (this will change the static background layer into a floating layer. (Layer 0) Now, load the selection "outer frame" that you saved earlier by going SELECT>LOAD SELECTION. Inverse your selection by going CMD+SHIFT+I (CTR+SHIFT+I in windows) and hit Delete to delete everything outside the image you'll be using . (MAKE SURE YOU ARE ON "LAYER 0") Select inverse again *CMD+SHIFT+I (CTR+SHIFT+I in windows)* and go SELECT>MODIFY>CONTRACT to contract your selection by 15 pixels. Save that selection as "Inner frame" by going SELECT>SAVE SELECTION. Now, load the selection "outer frame" again by going SELECT>LOAD SELECTION and choosing it in the "channel drop down menu" Then load the selection "innerframe" by going SELECT>LOAD SELECTION and choosing it in the "channel drop down and choose "subtract from selection" in the tick boxes at the bottom of the dialog. |
|
|
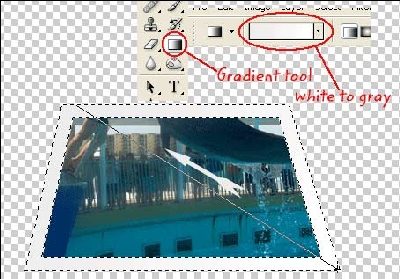
You should come up with something like this: |
|
While you have the above selection add a new Layer above "Layer 0" in the layers pallet and fill it with a gradient white to light grey. White bottom right to light grey top left. |
|
To give the image a little depth we'll manually add a drop shadow under Layer 0 Add a new layer below "Layer 0" and load the selection "outer frame" and fill it with black. Deselect and apply the gaussian blur filter with amount of 5 or 6. (enough where you see it coming out from behind the Layer 0 image.) |
|
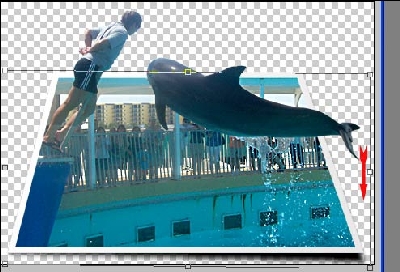
Now go EDIT>TRANSFORM>SKEW and drag it down a little bit on the right side. |
|
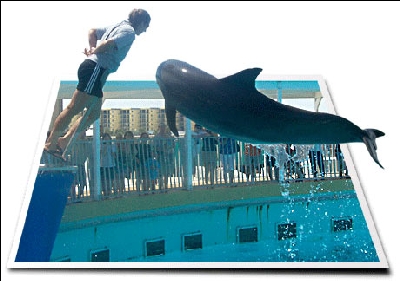
My finished image: |
|
|
It should be noted that, to use this in a print image at times you'll have to match the background that it will be on in the print document. Play with this a little bit and see what you can do with it.... there are several munipulations you can perform to take this technique to the next level. (I'll work on another tutorial along these same lines that I use alot.) |