
Vanishing Point (Part 2, Cloning)
Jan 17th 2007
| Another task that is handled with ease in Vanishing point is cloning things out of walls, floors or any other plane you might come across. This comes in especially handy when the plane is composed of a repeating pattern such as planks of wood, bricks or tile. Vanishing point lets you choose a point to start cloning and this scales your brush size on the fly making it smaller or larger according to where you are on the plane. | |
|
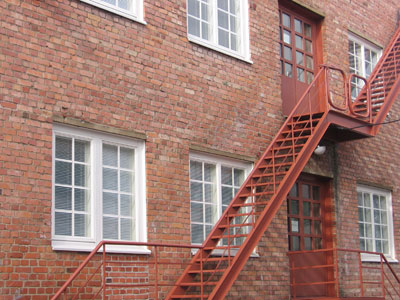
I'll be taking a window out of this brick wall using the clone tool within Vanishing point. I snatched the image from Morguefile.com, thanks to "kettu" the photographer. Let's get started! |
|
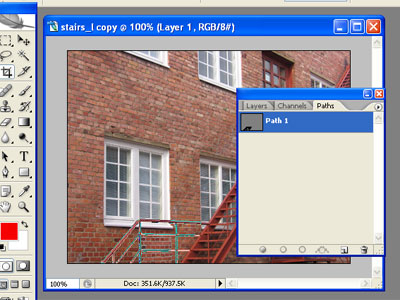
To begin with I see that under the window (bottom left) the bricks have been replaced with bricks that don't match the originals. I'll be wanting to fix that too so I'm going to need a path or selection of the hand rail. I used the "pen tool" to path the hand rails in front of the window I'll be removing. Once pathed I saved the path to use as a selection later. |
|
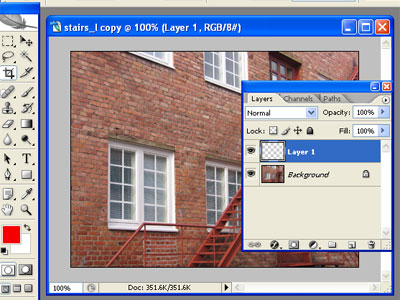
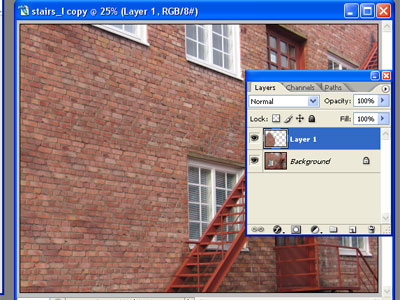
Next I made a new layer above the background layer. This is the layer I'll be cloning onto so I keep the original. Now with the empty layer selected in the layers pallet I went to Filters > Vanishing point. |
|
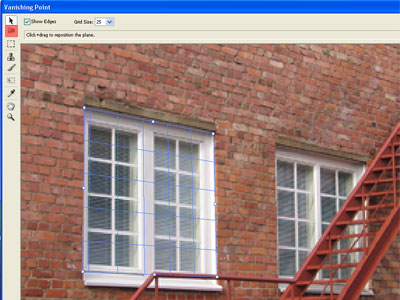
Within Vanish point I used the "Create Plane Tool" (keyboard shortcut "C") to draw a grid around the window. I used the window so the perspective will be correct. |
|
|
With the plane created I select the "Edit Plane Tool" (keyboard shortcut "V") and by grabbing and dragging the center handles on the four side of the plane I extended it over the entire area I'll be working. |
|
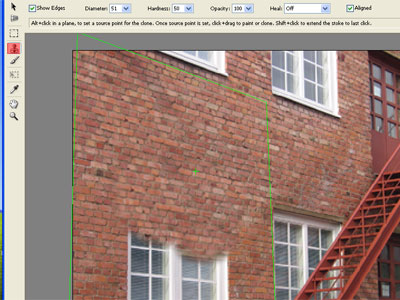
After extending the plane I selected the "Stamp Tool" (keyboard shortcut "S"). The stamp tool in Vanishing point operates just like the Clone/Stamp tool in the photoshop interface. You Option (Alt in windows) click a sample point. and then move to the area you'll begin painting. The difference here is that I had to line up the grout lines of the brick. No problem in Vanishing point, The brush actually takes the sample point image with it. So all that has to be done is line up the grout lines and start painting. Vanishing point will scale my brush (ie the grout lines) as I get deeper or closer in the to keep the bricks looking uniform. |
|
(A note about using the "healing" option when cloning) When using the stamp tool you have the option of turning "healing" on. This can be very good if you have alot of room to work with and can cover the area without stopping in mid stream. However, if you are going to have to stop cloning in an area where you have a different color, the healing option will attempt to blend the area. Example: while cloning say I have to stop over the window, all the white in the window frame will be blended into my bricks giving them an unwanted white hue not found in the bricks anywhere else in the image. After finishing the clone of the wall, all the way down, even over the hand rails I click OK in the top right corner of Vanishing point to exit and apply my changes to the image. |
|
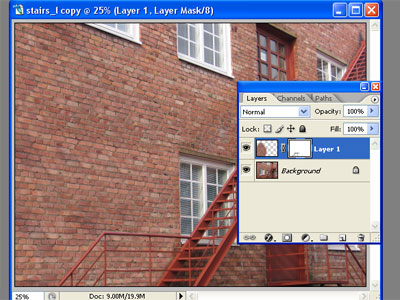
Now I bring up my "paths" pallet and Make the path a selection (feather radius of 1 pixel). Next I invert the selection CMD+SHIFT+I (CTR+SHIFT+I windows) and select my "Layer1" in the "Layers" pallet. All thats left to do is click the "create layer mask" icon at the bottom of the "Layers" pallet. |
|
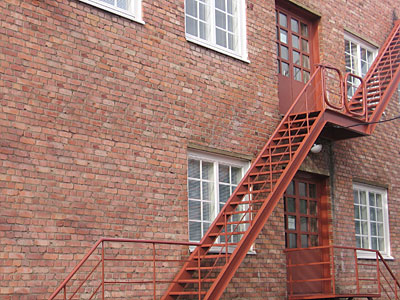
Here I have my finished image, honestly if I was actually going to use this for print I would now zoom in and with the paint brush and clone tool fix some of the more obvious cloned areas. I can see some duplication across the area I cloned so if its was something I was going to use I would fix that. |