Reviews, updates and in depth guides to your favourite mobile games - AppGamer.com
|
Tutorials
The magic wand tool. A great way to make your selections...
Oct 18th 2005
|
Making Selections: Wielding the Magic Wand:
|
|
1.
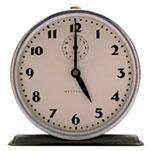
The Magic Wand  is a great tool for making selections... if you find the right image. is a great tool for making selections... if you find the right image.
There's reason many of those images you can buy or find online have a solid color background such as the clock to the left: to make an easy selection with the Magic Wand. |

|
2.
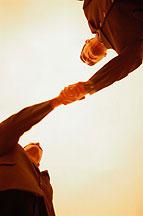
It's a simple matter to take two images like the ones to the left... |
|
|
|
3.
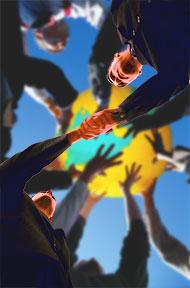
And create a third, composite image like this almost exclusively through the use of the magic wand. The example above took about 7 minutes of work. It's that easy when you get the hang of it. |
|
4.
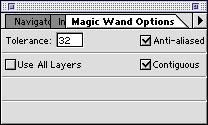
Double click the Magic Wand to see the tool's options palette. The wand selects contiguous pixels of a similar color and value. In other words, if you've got an image like the clock above, with one click on the white background, you've got the entire area selected. You can then fill the background with another color, or pattern. You can choose Select: Inverse to select the clock and copy and paste it on a new layer. Then you can paste another image behind it to create a composite image. That's what I did with the guys shaking hands in the example above. In the options palette, the [Tolerance] field controls the number of colors and values selected. If the tolerance is set to 0, only one color or value will be selected where you click the wand. When it's set to 32 (default) a range of 32 colors and values will be selected where you click. (The wand selects up to 16 lighter values and 16 darker values of the color of the pixel you choose to click on. 16+16=32 Get it?) The bottom line is type in a larger number to select a wider range of color. The other buttons aren't all that important now. If you're dealing with photographs, just make sure the [Anti-aliased] box is checked. It softens the edge of your selection a bit and helps it blend in somewhat wherever you decide to put it. An "aliased" selection has a very jagged, pixelated edge and will look unnatural. |
 |
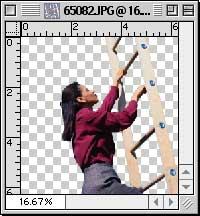
5.
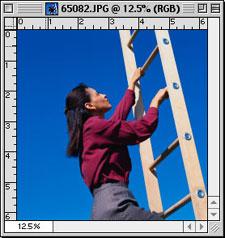
Lets put the wand to work on an image:
Take this all-too corporate metaphorical image of the woman climbing the ladder. I'm going to replace the background. But unlike the clock, that blue sky is not one continuous area. It's broken up- by the rungs of the ladder, for example. No problem.
|
 |
6.
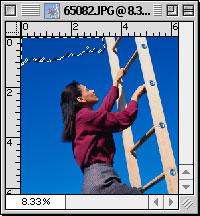
I'll start by clicking in the upper left. With the [Tolerance] field set to 5, here's what I get (see left):
Not so good, huh? You see the sky is actually a monochromatic gradation: a gradual change in a color's value (from darker blue at the top to a little lighter tint at the bottom.)
Knowing what I do about how that Tolerance value works, I'm better off clicking on the middle left side (in the center of the gradation) than at the top. But the low tolerance still doesn't get me enough (I just knew it wouldn't!) |
 |
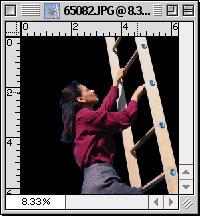
7.
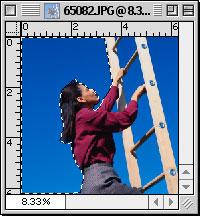
With a couple of other tries, I find the default tolerance of 32 doesn't quite make it, but a
value of 40 does just fine. |
 |
8.
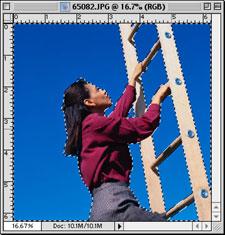
Now I just have to select the areas of the sky that are separated from the biggest portion.
Enter the "shift" key! If you hold down the Shift key when making additional selections, the new selections are added to the first. Try that without the Shift key and your first selection is wiped out as the second is made. Incidentally, the Option key (Windows = Alt key) is sort of the opposite. Hold down that key and you can subtract from previous selections. These selection key tricks work with ALL the selection tools. Get used to it and you'll be a selecting machine!
So as I hold the Shift key I click in between the ladder rungs, between her arms, and everywhere I still want selected. Bing, bang, boom- I've got the whole sky selected. |
 |
9.
Next I choose
Select: Inverse
to grab the woman and her ladder. Then Copy and Paste. (They're both located under the Edit menu, but here's some keyboard shortcuts worth memorizing. Copy is [Command-C] on Mac or [Control-C] for Windows. Paste is [Command-V] on Mac or [Control-V] for Windows.) Photoshop obligingly creates a new layer for my climbing woman. |
 |
10.
Now you're free to put whatever you'd like in the background. If you need to create a
new layer for this, click on the background layer in the Layers Palette, then choosing
Layer: New: Layer...
If I fill that layer with black, you can easily see the small amounts of blue that the wand didn't select.
With a little eraser  work at high magnification on the woman's layer the pesky blue pixels are gone. work at high magnification on the woman's layer the pesky blue pixels are gone. |
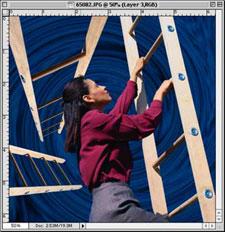 |
11.
I put a couple other ladders behind her (selected from a photo in the same manner as above), and an
image of water that I applied the [Distort: Twirl...] filter to. With a few minutes work the meaning of the photo is changed. From a contrived career statement, the content now seems a little confusing and Surrealistic. A good day's work. |
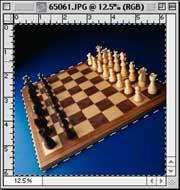 |
12.
Don't forget; adjusting the tolerance isn't the only way to enlarge your selection of a large
area.
With the tolerance set to 40 (which never would have selected the wide range of values in the chess board image above), I just held down the Shift key and kept clicking. It took 8 or 9 clicks, but in a few seconds I had entire background in my selection. Don't forget the Shift key! |
 |
13.
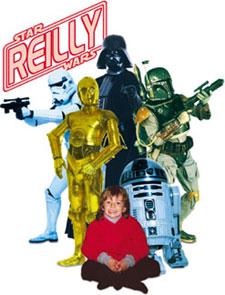
Here's a T-Shirt transfer I made for my son. He had this book where all the characters from
Star Wars were against a white background. I thought, "Hey, no difficult outlining to do!" All I had to do was Magic Wand the white area and select inverse. In a relatively short period, my son was surrounded by heroes and villains from his favorite movie.
Happy Image Editing! |
|
|
Latest Forums Clone YourselfThat is quit nice. But I think that can be more easy to do.. |
|
|
