Reviews, updates and in depth guides to your favourite mobile games - AppGamer.com
|
Tutorials
Let's make some party text in a few easy steps
Oct 18th 2005
|
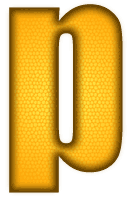
Wild Looking Party Text:
|
 |
1.
Start with a new 400x400 image with a white background for
this tutorial. Grab your text tool and make your text (
I used the "impact" font with a size of 400 and a RGB of 82, 52,0). Once you have your text done go to Layer/Type/Render Layer to render your text. Name this layer base. |
|

|
2.
Now Ctrl+Click on the "base" layer and create a new layer above the "base" layer ( Name this layer "highlight 1" ). Now go to Select/Modify/Contract and choose a value of 6. |
|
|
|

|
3.
Now select an RGB value of 157, 100, 1, and fill the selection
with that color. Press Ctrl+D to "deselect" the layer. Now go to Filter/Blur/Gaussian Blur and choose a value of 5. |

|
4.
Now Ctrl+Click on the "highlight 1" layer to select it and create a new layer above this one ( Name this layer "working" ). Go to Select/Modify/Contract and select a value of 4 this time. Choose an RGB value of 255, 165, 6, and fill it with that color. |
 |
5.
Make sure you are in your "working" layer and make sure it is NOT selected. If it is selected hit Ctrl+D to deselect it. Now go to Filter/Texture/Stained Glass and use the values that I have here. Cell size=2 Border Thickness=1 and Light Intensity=3. If that step is followed correctly you should end up with something that looks like the image on the left =) |
 |
6.
Now go to Filter/Distort/Glass and use the values of Distortion=16,
Smoothness=15, Texture should be set to Frosted, and the Scaling
should be 100%. Now your image should look like the image
on the left... Which actually looks pretty cool just like
it is with that neat little design in there. But, we'll go
on... |
 |
7.
Now go to Filter/Noise/Dust and Scratches and use the settings
of Radius=3, and Threshold=0. Then go back and run the Filter/Distort/Glass
again and leave the settings as they are. They should still
be the same as we just did above. If for some reason they
have changed, change them back to the above settings that
we used the first time. OK, it's not looking pretty but we
are about to get real Funky here so hold on. |
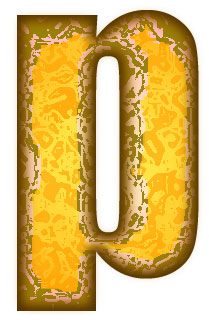 |
8.
Last but not least Go to your Filter/Artistic/Dry Brush and
use the settings of Brush Size=0, Brush Detail=3, and Texture=3.
Run this filter with these settings a total of 4 or 5 times
depending on your own taste. Now you should have an image
that looks like mine on the left. |
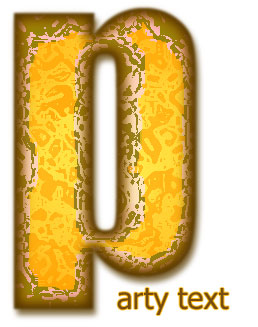 |
9.
Now the only other thing you may want to do is add a drop
shadow to your "base" layer and if you don't like the hard edge look run the Filter/Blur/Guassian Blur with a setting of about 1.2 |
|
|
Latest Forums Clone YourselfThat is quit nice. But I think that can be more easy to do.. |
|
|
