Reviews, updates and in depth guides to your favourite mobile games - AppGamer.com
|
Tutorials
Stamp out unwanted data using the rubber stamp tool.
Oct 18th 2005
|
Stamping Out Unwanted Data: Using the Rubber Stamp Tool:
|
|
1.
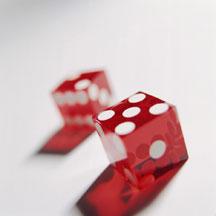
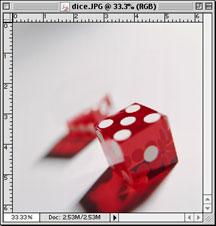
In this image of dice, I want to get rid of the blurry die in the background. There's at
least two ways to do this.
One is to fill the blurry die's area with a gradation of colors sampled from the background, Add Noise and Blur appropriately.
Instead of doing that, I'm going to use the Rubber Stamp Tool  to paint over our unwanted area. to paint over our unwanted area. |
 |
2.
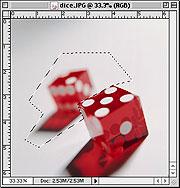
First I have to make a selection to protect our die in the foreground. I used the Polygonal lasso
to make a quick straight-edged selection that would not include the larger die.
(Of course,when you magnify the image, you might find that the quick, straight edged selection isn't perfect near the slightly rounded corners of the die. I could go in there at high magnification and refine the selection with the freehand Lasso Tool, but I'm not going to worry about that now. If anything doesn't look right, I'll just go in there later with the history brush  and fix the area.) and fix the area.)
Next I'm going to feather the selection. Choose
Select: Feather...
and enter a number in the [Feather Radius] field. The number you enter will determine the number of pixels at the edge of the selection that will be feathered. This will prevent the die's edge from having a really hard, artificial-looking edge on the top and mimic the slight blur of it's other "natural" edges.
Your choice of a variable in the [Feather Radius] field depends on the ppi (pixels per inch) of the file. For this image, which was about 6"x6" and 150ppi, I chose a feather of three pixels. Had this been a much larger image, say 300ppi that I wanted to look good coming out of my printer at 300dpi (dots per inch), I would have typed in a larger variable- maybe 5 or 6 pixels. (Your choice in variable fields such as this, is just something that will just come with experience. To get to know Photoshop better, try out several different options; see what the results are later; then go back by using the history palette or saving at crucial stages, then reverting to the last saved version and trying again.) |
|
|
|
3.
Now it's Stamping time! Select the Rubber Stamp tool and establish a source by positioning
the tool at the location you want to start cloning from, holding down the Option key (Windows =
Alt) and clicking. (Notice your cursor changes when you hold down the key to define a source. If
you try to start stamping without first defining a source, you'll get an error message saying
that you just made a boo-boo.
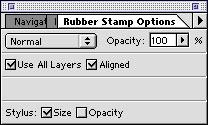
Before you start painting, or "cloning" if you will, lets check the settings for the tool and choose the right brush. If you double-click the Rubber Stamp Tool, the rubber stamp options palette (left) should come to the foreground. For most jobs, you can leave the mode at "Normal" Opacity should be set at 100%. Set it any lower and the cloning you do will be somewhat transparent. I use this option when I want the effects to be subtle, such as blending an edge between two different areas. You can uncheck the "Use All Layers" box if you only want to clone from the layer you're currently on. (in this case, it doesn't matter - my image only has one layer). I want the cloning source to follow me as I move on down, covering the unwanted die, so I'll leave the "Aligned" box checked. If you uncheck it, each time you release the mouse the cloning source reverts to where you first clicked (which can be useful if you're cloning from a very small area.) |
|
4.
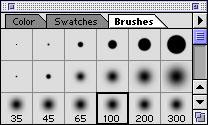
I have a large area to clone from and a large area to cover so I'll choose an appropriate brush.
Choose "Show Brushes" from the "Window" menu if the brush palette is not already visible. I'm picking a 100 pixel brush to start. |
 |
5.
I clicked to define my source above the top corner of the farthest die, so I'm ready to start
cloning. I sweep my rubber stamp brush back and forth over the die and soon its half gone. |
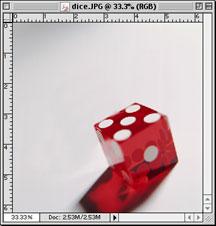 |
6.
Photoshop is copying the pixels from where you defined and painting or cloning them onto the area
your brush sweeps over. You have to let up every once in a while. If you don't, you'll
notice the cloning source has been moving the same distance and direction you have, and you'll
start to see the top of the die appear again- only much lower.
I keep on cloning, carelessly painting over the foreground die (remember it's protected by that selection), until the one I wanted to cover is gone. |
 |
7.
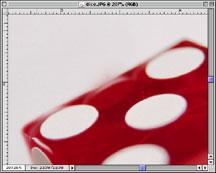
A close up examination reveals that I did a pretty good job feathering the selection and the edge
looks similar to the rest of the edges.
If I want to make the thing perfect I can do something about that area on top of the die between the two white dots. Do you see there's just a bit too much red left over from the background die? |
 |
8.
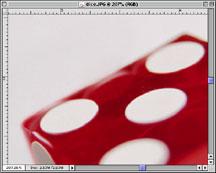
Now is when I'll set the opacity lower on the Rubber Stamp Options Palette (21%), pick a
small brush (13 pixels), and carefully cover that up. First I had to deselect everything to affect
that area. See to the left. The difference is subtle.
All the pixels on the die I kept visible are intact, so I have no need to use the history brush to restore them. (The History Brush paints in pixels from an earlier version of the image, such as when it was opened.) |
 |
9.
That's all baby! Now you can start cloning at will! Who cares what the conservatives
say!
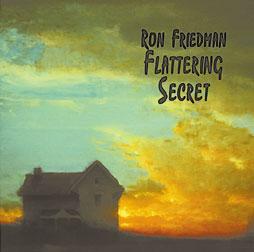
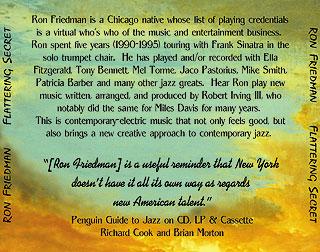
I used the clone brush (rubber stamp tool) a considerable amount, along with many paint brushes to create the image below. I was making a CD booklet for a Jazz artist and had only one image to work with; a painting the artist wanted to use on the cover. Rather than repeat the image several times, I used variations of the painting as background for the text. Here you can see the cover of the CD, and the inlay card. On the inlay card (the back of the CD case) I made a version of the sky that appears on the cover painting, but removed the house and rearranged the composition of the clouds a little to suit my compositional needs. It was challenging to imitate another artist's style as I redid his painting. See if you can tell what I did and where: |
  |
10.
I used the cloning brush to distort the features of this nice 1950's fellow here on the top.
Until he looked like the strange individual you see on the bottom. |
  |
11.
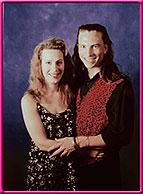
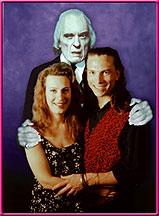
I had to extend the top of the image of my wife and I to accommodate the tall, scary gentleman in
the example you see to the left. The cloning brush was the perfect tool.
Now, go crazy cloning! Happy Image Editing! |
|
|
Latest Forums Clone YourselfThat is quit nice. But I think that can be more easy to do.. |
|
|
