Reviews, updates and in depth guides to your favourite mobile games - AppGamer.com
|
Tutorials
Retouching a photo. Step 7: The final nightmare.
Oct 18th 2005
|
Retouching & Color Correcting 7: The Final Nightmare:
|
|
1.
Now I'm going to play
God and alter the background. Why? Because I can. With Photoshop you have the power to be the
master of reality! OK, so it's only 2-D reality, but you've got to start somewhere. My
legitimate goal here is to create a slightly better composition in the image that will also be
nicer to look at. I'll create an "idealized" reality.
The Story So Far...
In steps 1 - 4 of my serialized tutorial I altered the values and colors of the image via the Levels; Curves; Color Balance; & Hue/Saturation Commands.
Next, in Steps 5 & 6, I used the Airbrush  and and
Rubber Stamp  tools to erase all defects from the image. I've got a clean and clear image now, but I'm about to radically alter the appearance of the grassy areas. tools to erase all defects from the image. I've got a clean and clear image now, but I'm about to radically alter the appearance of the grassy areas. |
 |
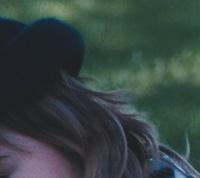
2.
All my changes to the image in this step of the tutorial have to do with compositional changes. To
make these, a good knowledge of the Elements & Principles of Design is important. Line, Shape, and Color are examples of elements. Things like Balance, Movement, Unity/ Variety, Emphasis are principles and they have to do with the effect the arrangement of the elements has on a viewer.
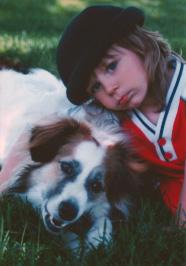
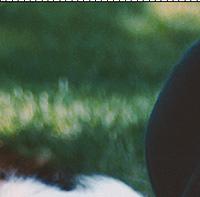
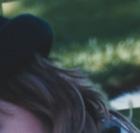
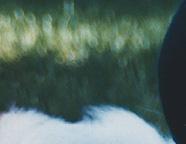
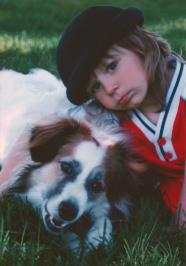
This photographer had a good intuitive sense of design and has given us good material to work with. My first idea is to change what we see in the upper right. I like this yellowish shape that we already have on the left side (see upper image). The highlight caused by the sun breaking through tree branches forms a shape which serves to lead the viewer's eye into the composition and right to the boy. I'd like something similar on the other side.
I start off by selecting the area I'd like to emulate, flipping it horizontally and rotating & scaling it a bit, using the Edit: Transform commands. I can't just copy it and put it in place that would look too contrived. Viewer's would suspect something fishy right away.
Remember to create a new layer for any changes you make to an image. |
|
|
 |
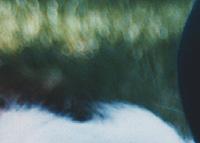
3.
My next few steps will
be aimed toward changing what I've copied enough to make it look believable.
Once I've put my duplicate shape in place, I load the inverse of the selection I made of the upper grass in step 4 of this tutorial. All I have to do is hit the delete key to get rid of the area that covers the boy's face.
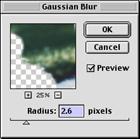
Now I'm going to blur the new area a bit. Since that portion of the yard is angling off diagonally, it's farther away from us than the other. I choose Filter: Blur: Gaussian Blur... and observe that a radius of 2.6 pixels looks good.
Take a look at the result in the image to the left. I still see some of the dog, so I need to work on that area. |
 |
4.
I used the
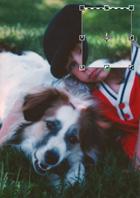
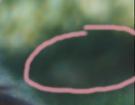
Airbrush and Rubber Stamp tools to retouch out the dog fur as described in the previous step to this tutorial. Now I still see some of the remnants of the dirt that was above the dog.
I've circled the area in question in the image at left. More use of the airbrush and stamp tool makes short work of that.
Remember, you have to look for appropriate colors to sample (airbrush) and appropriate cloning source points (rubber stamp) while varying the opacity of each.
If you notice that the colors have changed, it's because while I'm doing all this work, I've turned off all my adjustment layers temporarily.
|
 |
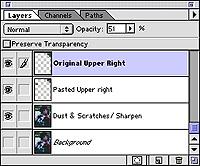
5.
One final step on that upper right corner. I want it to look different enough from the other side,
so I'm going to get back some of it's original qualities.
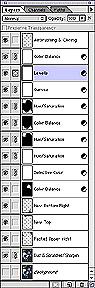
Notice the two layers I created. "Pasted Upper right" contains all the work I've done so far in the upper right. I load a selection of that layer and go back to the original image and copy that area. Next I create the layer, "Original Upper Right" and paste it there. I use the Layer Opacity Slider to determine what a good blend is. Surprisingly, 51% ends up looking pretty convincing (I thought Opacity would have to be much less). |
|
6.
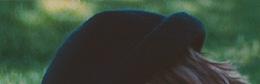
Now back to the upper left side of the image: over the dog. There's a tree right next to these
guys out of camera shot and we're seeing a little of the dirt that's cut out around the bottom of
the tree. That what that dark area immediately above the dog's rear is. Who wants to see that,
right?
A little selective cloning from above and below the highlight line with the rubber stamp tool, and soon that area is filled with grass. Much nicer. |
|
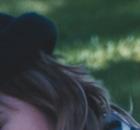
7.
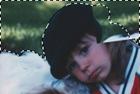
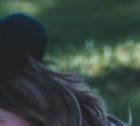
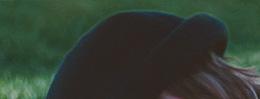
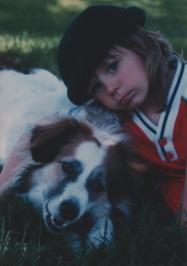
To the left here, you see what the image looks like so far. Our faux upper right corner looks
pretty natural. I'm going to do a lot more, but let me just show you one more thing to complete our
alteration of the top section of this photo.
There's a few spotty highlights above and around the top of the child's hat. There doing nothing for the composition, except acting as a distraction. I do some more cloning and create the new section you see to the left. Nothing fancy here; I just want the grass to look unbroken and consistent in color.
You should look at every part of your composition. Question every element. Is there something that "doesn't look quite right?" Try to figure out why that is, and come up with remedies. |
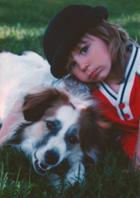  |
8.
To the left here, you see what the image looks like so far. Our faux upper right corner looks pretty natural. I'm going to do a lot more, but let me just show you one more thing to complete our alteration of the top section of this photo.
There's a few spotty highlights above and around the top of the child's hat. There doing nothing for the composition, except acting as a distraction. I do some more cloning and create the new section you see to the left. Nothing fancy here; I just want the grass to look unbroken and consistent in color.
You should look at every part of your composition. Question every element. Is there something that "doesn't look quite right?" Try to figure out why that is, and come up with remedies. |
 |
9.
To the left here, you see what the image looks like so far. Our faux upper right corner looks pretty natural. I'm going to do a lot more, but let me just show you one more thing to complete our alteration of the top section of this photo.
There's a few spotty highlights above and around the top of the child's hat. There doing nothing for the composition, except acting as a distraction. I do some more cloning and create the new section you see to the left. Nothing fancy here; I just want the grass to look unbroken and consistent in color.
You should look at every part of your composition. Question every element. Is there something that "doesn't look quite right?" Try to figure out why that is, and come up with remedies. |
|
10.
To the left here, you see what the image looks like so far. Our faux upper right corner looks pretty natural. I'm going to do a lot more, but let me just show you one more thing to complete our alteration of the top section of this photo.
There's a few spotty highlights above and around the top of the child's hat. There doing nothing for the composition, except acting as a distraction. I do some more cloning and create the new section you see to the left. Nothing fancy here; I just want the grass to look unbroken and consistent in color.
You should look at every part of your composition. Question every element. Is there something that "doesn't look quite right?" Try to figure out why that is, and come up with remedies. |
|
|
Latest Forums Clone YourselfThat is quit nice. But I think that can be more easy to do.. |
|
|
