Reviews, updates and in depth guides to your favourite mobile games - AppGamer.com
|
Tutorials
Make your selections by using the color range command.
Oct 18th 2005
|
Making Selections: Using the Color Range Command:
|
|
1.
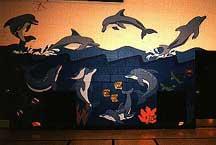
If you read the tutorial regarding using the
Adjust: Brightness/Contrast command, you saw me take
this sorry picture of a mural I painted and make it
a little more presentable, with the aid of the Color
Range Command.
Here I'm going to get a bit more in depth on that command and use it to make a couple selections.
|
 |
2.
The Color Range Command will select areas of your
image based on colors and ranges you specify. When I
use it, most of the time I'm just enhancing or
changing colors (I might take a selection of all the
greens in an outdoor photo and crank them up so the
grass and leaves look a little greener, for
instance.)
In the image at left, I enhanced many of the colors using the color range command. But you can also use it to copy or delete areas of a photo. Which is what I'm going to do in this tutorial. |
|
|
|
3.
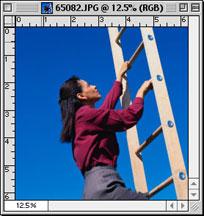
Remember this photo?
In the tutorial on the use of the Magic Wand , I wand-ed the sky so we could place the woman and ladder on a layer of their own. The wand selects contiguous pixels within a certain color range. Might it not be easier to select that blue sky using the Color Range Command? Let's find out. , I wand-ed the sky so we could place the woman and ladder on a layer of their own. The wand selects contiguous pixels within a certain color range. Might it not be easier to select that blue sky using the Color Range Command? Let's find out.
First I'll use the Eyedropper Tool to sample a medium blue from the sky. When I click on the sky my foreground color changes to that of the pixel I just clicked on. to sample a medium blue from the sky. When I click on the sky my foreground color changes to that of the pixel I just clicked on. |

|
4.
Now choose:
Select: Color Range...
The Color Range dialogue box pops up. You'll see a small grayscale preview of the image you're working on, and the areas that will be selected when you click [OK] appear as white in the little black and white preview. (Incidentally, if you want to see the preview in color, as it does in my screenshot, simply hold down the Command key (Windows key=Control))
The [Select] pop up menu allows you to choose a preset color or range of values. Mine's set to [Sampled Colors] because I want to select colors similar to that medium sky blue I clicked on with the eyedropper.
You can control just how much gets selected by dragging the [Fuzziness] slider. Higher numbers = more is selected, and the maximum is 200. You'll notice the changes reflected in the grayscale preview as you drag the slider. Remember, what will get selected appears as white. My Fuzziness Slider is set at 162. I found that at a smaller number, I was not getting some of the blues selected in the lower sky. |
|
5.
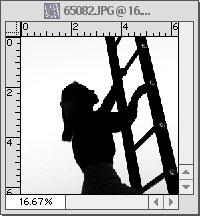
My preview looks like the image at left so things
are looking good.
If at 200, you still don't have enough of your appearing white, you can add sampled colors by clicking the eyedropper tool with the plus symbol next to it or by holding down the shift key and clicking with the regular eyedropper. Now if you click in your original image (or the little grayscale preview) on a new color that range of colors will be added into the selection. To remove colors from the "range" you can click the eyedropper with the minus symbol next to it or by holding down the option key (Windows key=Alt).
The [Save] button lets you save your current color range settings, and [Load] will load some settings you saved previously. If you do a lot of work to get the perfect color range you may want to save it.
The [Selection Preview] pop-up menu affects how you see the image you're working on.
After you've had your fill of adding / removing colors and sliding the fuzziness selector, make sure the areas you want selected appear white, then click [OK].
(By the way, if you're not satisfied once you see the selection in place, just hit Command-D or Control-D (Windows) to Deselect. Then go back and try the Color Range Command again. If you forget to deselect, the Color Range Command will only select from the area that is currently selected)
|
 |
6.
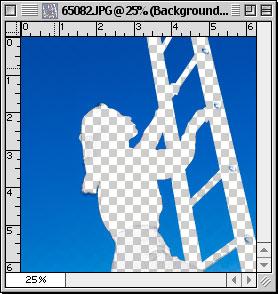
Well, above you can see exactly what I got
selected. It's not bad at all. However
it's not perfect. I got too much of the
woman's hair, some of her skirt, ...
|
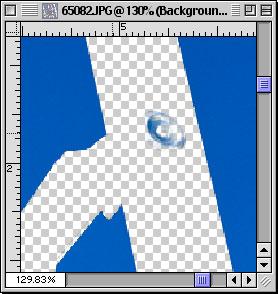 |
7.
...and these little parts off the ladder:
They were silver, so they reflected a lot of the sky's blue and thus showed up in my Color Range selection. No big problem. I'd just go in there with the eraser and get rid of it, or use the lasso tool and get rid of it, or use the lasso tool while holding down the Option (Windows = Alt) key to deselect unwanted parts. while holding down the Option (Windows = Alt) key to deselect unwanted parts.
It ends up being a comparable amount of work to using the wand.
What have we learned? There's more than one way to do almost any job in Photoshop!
|
 |
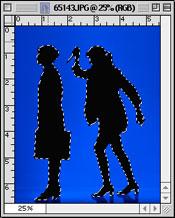
8.
Here's another example. I found this nice
silhouette of attempted homicide, and I want to
change the background.
I set my foreground color to black and choose:
Select: Color Range...
With the [Fuzziness] set to 200 I get everything I want so I click [OK]. |
 |
9.
Looks pretty good, But I want to have the floor,
too. Nobody wants to see these two women just
floating in space, do they? |
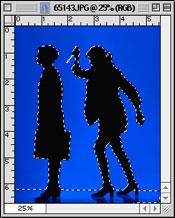 |
10.
I hold down the Shift Key and use the Polygonal Lasso tool
to draw a selection around the floor.
|
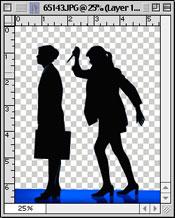 |
11.
Now simply Copy and Paste from the Edit Menu (Copy is [Command-C] on Mac or [Control-C] for Windows. Paste is [Command-V] on Mac or [Control-V] for Windows.) A new layer is created as your selection is pasted. If I turn off the background layer (click that little "eye" icon next to it), the image looks like what you see at the left. |
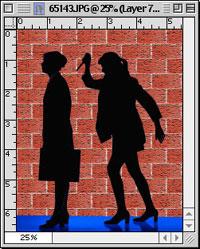 |
12.
Now I can put in whatever background I'd like.
I can throw in some hastily made bricks to place
this illegal act in and alley: |
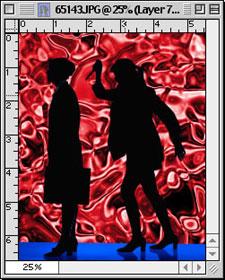 |
13.
Or make this frightening liquid red background:
or I can paste in another photo, etc.. There are lots of options.
Happy Image Editing! |
|
|
Latest Forums Clone YourselfThat is quit nice. But I think that can be more easy to do.. |
|
|
