Reviews, updates and in depth guides to your favourite mobile games - AppGamer.com
|
Tutorials
Let's make that text GLOW...
Oct 18th 2005
|
How to Create Glowing Text:
|
 |
1.
Hey, who doesn't like that spiffy glowing text effect? It's simple to do. So simple that Photoshop made it an "Effect" on the Layer Menu (Outer Glow...). But that effect gives you limited control and doesn't let you understand exactly what's going on. I'll change all that. Read on and soon you'll be impressing your friends with the most radioactive text on the block. |
|
|
2.
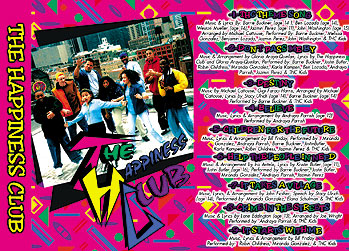
I first figured out this effect back in Photoshop 3.0, when I was working on a Compact Disc booklet for a local group of hip-hoppers. Check out the shrunken image of their cassette card to the left:
They were insisting on a plethora of colors on the CD layout to go along with their funky music. Some of the text was made of letters made of each of the primary and secondary colors and as a result became very hard to discern from it's background. While I didn't exactly make the letters glow, I developed the simple series of operations that creates the same effect. You can see how the feathered white area is placed behind the colored text and the tiny black text under it. This allowed me to keep the multi-colored background and make the type much more readable. |
|
|
|

|
3.
Here's how you can make your text (or anything) shine:
1. Create a new document. It's size and resolution is determined by what your purpose for the file is, of course, but for my example below, I chose: width=3in.; height= 2in.; 72ppi.
2. (Reset your foreground and background colors to black and white if needed, by clicking where my cursor is pointing in the image to the left:
Fill the image with Black by choosing
Edit: Fill... (contents=Foreground Color; Opacity= 100%)
or use the keyboard shortcut [Option-Delete] for Mac or [Alt-Delete] for Windows.
3. Pick a color for your text. There are many ways to do this of course; I like to click on the foreground color square and select a new one from the Color Picker window that pops up. I'm picking a Blue-Violet. |
|
4.
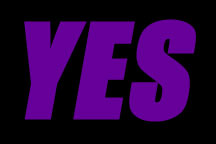
Select the text tool  and click on your image. A new layer is created, and you can type and edit your text in the Type Tool dialogue box which pops up. As you type, your letters appear in the image window. I typed the word, "YES." You can reposition them by clicking and dragging to help you better choose what point size. I'm using a size of 120 points on a font named "Impact" Your text should fill about 70% of the image window and be centered to allow room for the glow effect we'll put behind it. and click on your image. A new layer is created, and you can type and edit your text in the Type Tool dialogue box which pops up. As you type, your letters appear in the image window. I typed the word, "YES." You can reposition them by clicking and dragging to help you better choose what point size. I'm using a size of 120 points on a font named "Impact" Your text should fill about 70% of the image window and be centered to allow room for the glow effect we'll put behind it. |
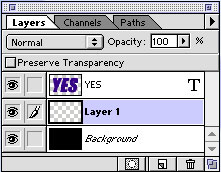 |
5.
Time to make the glow. First, create a new layer below the type layer. One way to do this is by
clicking on the background layer in the Layers Palette, then choosing
Layer: New: Layer...
name it "glow" if you want then click [OK]. If you're playing along at home your Layers Palette should look something like this so far: |
 |
6.
With your new layer selected, make a selection of the text. The easiest way to do this is:
Macintosh: Command-click (hold down the Command key and click) on the layer with your text on the Layers Palette.
Windows: Control-click (hold down the Control key and click) on the layer with your text on the Layers Palette. |
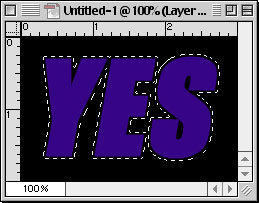 |
7.
Expand the selection by choosing:
Select: Modify: Expand...
and enter a value. The value you enter should depend on how big your file is. For my little 72dpi file,I picked 3 pixels. |
 |
8.
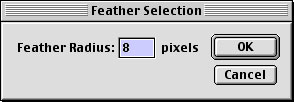
Now I'll feather the selection. Choose
Select: Feather... |
 |
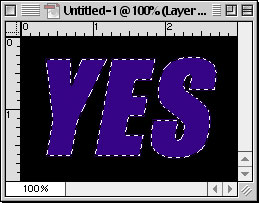
9.
This will create a softened, gradually diminishing edge on your selection. I chose “8” for my Feather value. This results in a very bizarre looking selection edge. Don't Panic!
To get rid of the frightening distraction of the selection marquee choose
View: Hide Edges
to hide the selection. (There's a keyboard shortcut that's worth memorizing. It's [Command-H] on Mac or [Control-H] for Windows.) |
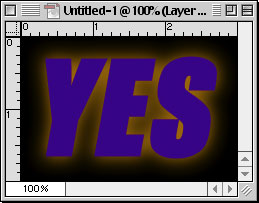 |
10.
All we have to do now is fill that darn selection. First, pick a new Foreground Color. I picked a
slightly-orange Yellow. Then I filled the selection by pressing [Option-Delete] (or [Alt-Delete] for
Windows.)
|
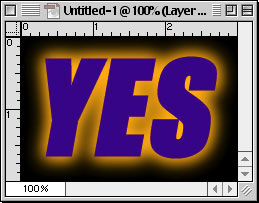 |
11.
O.K., but not quite enough. I decided to fill the selection a couple more times, each time, the word "YES" gains more and more urgency.
|
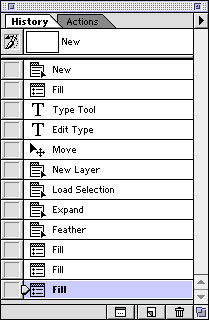 |
12.
Take a look at my History Palette to see there's just twelve painless steps to having the
coolest type in town: |
 |
13.
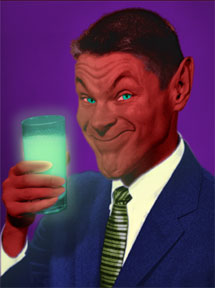
That's it! You're a pro now! Once you've got the hang of expanding, feathering and
filling selections, you can use this effect to make just about anything glow. I've used it to
create light sabers in Star Wars images. I used a variation on it in my goofy distorted image below
to make it look like there was something not quite right about this man's beverage:
Happy Image Editing! |
|
|
Latest Forums Clone YourselfThat is quit nice. But I think that can be more easy to do.. |
|
|
